
Is your lawn mower ready for a summer full of perfect cuts? If you’re new to the world of lawn care and maintenance, fear not! This beginner’s guide will provide you with essential tips and tricks to ensure that your lawn mower stays in top shape all season long. From simple tasks like cleaning and blade sharpening, to more complex maintenance procedures, we’ve got you covered. So grab your tools and let’s get started on a journey towards a beautifully manicured lawn!
1. Cleaning the Lawn Mower
Maintaining a clean lawn mower is essential for its performance and longevity. Regular cleaning not only improves the efficiency of the machine but also prevents clogging and buildup of debris. Here are a few key steps to keep your lawn mower clean and in top shape.
1.1 Removing Debris from the Mower Deck
Before starting any cleaning process, it is crucial to ensure the lawn mower is turned off and the spark plug is disconnected for safety purposes. Once you’ve done that, begin by removing any debris from the mower deck. Use a brush or a putty knife to gently scrape off any clumps of grass, mud, or other debris stuck to the underside of the deck. Be careful not to damage the blades or any other components while doing this.
1.2 Cleaning the Air Filter
The air filter plays a vital role in ensuring that clean air reaches the engine. Over time, it can become clogged with dirt and debris, affecting the performance of the lawn mower. To clean the air filter, start by locating it. It is usually situated on the side or top of the engine. Remove the air filter cover and inspect the filter for dirt and debris. If it appears dirty or clogged, gently tap it against a hard surface or use compressed air to blow away the dirt. If the filter is heavily soiled, it may need to be replaced.
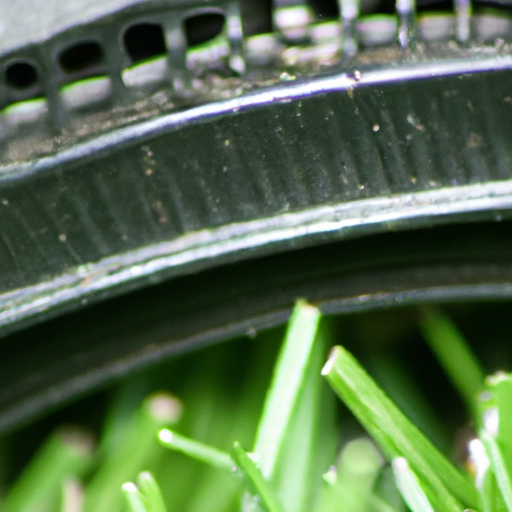
1.3 Removing Clippings from the Grass Catcher
If your lawn mower has a grass catcher attached, it’s important to clean it regularly to prevent clogging. Remove the grass catcher from the mower and empty the clippings into a bag or compost pile. Use a hose or a brush to remove any grass or debris stuck inside the catcher. Allow it to dry completely before reattaching it to the mower.
1.4 Cleaning the Mower Blades
Clean and sharp blades are essential for a neat and even cut. Start by disconnecting the spark plug to ensure the mower is not accidentally started. Tilt the mower on its side with the carburetor side facing up. Use a wrench or a socket to remove the blade retaining bolt, taking care not to damage the blade or the mower. Once the blade is removed, clean it with a wire brush or a cloth to remove any debris or grass clippings. Ensure the blade is sharp, and if not, use a file or a grinder to sharpen it. After cleaning and sharpening, reattach the blade and tighten the retaining bolt securely.
2. Checking and Changing the Oil
Regularly checking and changing the oil in your lawn mower is essential to maintain its engine’s performance and longevity. Oil lubricates the moving parts and helps prevent friction and wear. Here are the steps to ensure your lawn mower has adequate oil levels and clean oil.
2.1 Checking the Oil Level
Start by checking the oil level in your lawn mower’s engine. Depending on the model, there may be a dipstick or an oil fill plug to determine the oil level. Locate the dipstick or oil fill plug, remove it, and wipe it clean with a cloth. Reinsert the dipstick or plug and then remove it again to check the oil level. The oil should be within the recommended range indicated on the dipstick or near the top of the oil fill hole. If the oil level is low, add the recommended type of oil slowly and carefully. Be cautious not to overfill the oil reservoir.
2.2 Changing the Oil
Regularly changing the oil in your lawn mower is essential to remove old, dirty oil and prevent engine damage. To change the oil, start by placing a drain pan beneath the mower to catch the oil. Locate the drain plug near the bottom of the engine and carefully remove it to drain the old oil into the pan. Once all the oil has drained, replace the drain plug and tighten it securely. Next, refill the engine with the recommended type and quantity of oil through the oil fill hole. Wipe any spilled oil and ensure the oil cap is tightly closed.
3. Inspecting and Replacing the Spark Plug
The spark plug is responsible for igniting the fuel-air mixture in your lawn mower’s engine. Regular inspection and replacement of the spark plug are necessary to ensure a smooth start and optimal engine performance.
3.1 Locating the Spark Plug
The spark plug is typically located on the side or top of the engine, depending on the model of your lawn mower. Refer to your manufacturer’s manual to identify the exact location. Once located, gently remove the spark plug wire by pulling it straight off the spark plug.
3.2 Inspecting the Spark Plug
Inspecting the spark plug can provide valuable insights into the condition of your lawn mower’s engine. Look for signs of fouling, such as carbon buildup, oil deposits, or wear on the electrode. A clean spark plug with a light tan or grayish appearance indicates a healthy engine. If the spark plug is dirty or damaged, it may need to be cleaned or replaced.
3.3 Replacing the Spark Plug
If the spark plug shows signs of wear or damage, it’s important to replace it. Start by purchasing a suitable replacement spark plug that matches the specifications recommended by the manufacturer. Gently remove the old spark plug using a spark plug socket or a wrench. Install the new spark plug and tighten it snugly by hand. Finally, reconnect the spark plug wire, ensuring a secure connection.
4. Sharpening and Balancing the Blades
Sharp and balanced blades are crucial for a clean and even cut of your grass. Dull or unbalanced blades can cause an uneven cut, damage the grass, and put unnecessary strain on the lawn mower’s engine. Here’s how you can maintain sharp and balanced blades.
4.1 Removing the Blades
Before starting any blade maintenance, ensure the lawn mower is turned off and the spark plug is disconnected. Tilt the mower on its side with the carburetor side facing up. Use a wrench or socket to remove the blade retaining bolt, taking care not to damage the blade or the mower. Once the blade is removed, inspect it for any signs of damage or excessive wear.
4.2 Sharpening the Blades
If your blades are dull or nicked, it’s crucial to sharpen them to ensure a clean and precise cut. You can sharpen the blades using a file or a grinder. Follow the blade’s angle while sharpening, ensuring an even and sharp edge on both sides. Be cautious and wear protective gloves and eye protection during the sharpening process. Once sharpened, install the blades back on the mower and tighten the retaining bolt securely.
4.3 Balancing the Blades
Balancing the blades is important to prevent excessive vibration, which can damage the lawn mower’s engine and affect cutting performance. To balance the blades, there are specialized blade balancers available that indicate the balance point. Alternatively, you can use a nail, screw, or any cylindrical object to balance the blade. Place the blade on the object and observe if it remains level. If one end is heavier, gently grind or file away a small amount of metal until the blade is balanced.
4.4 Reinstalling the Blades
Once the blades are sharpened and balanced, carefully reattach them to the mower. Ensure the blades are installed in the correct orientation and the retaining bolt is tightened securely. Double-check that the blades can freely rotate without any obstructions before operating the lawn mower.
5. Cleaning or Replacing the Air Filter
The air filter is responsible for preventing dirt and debris from entering the engine, ensuring clean air for proper combustion. Depending on the type of air filter, it may require cleaning or replacement for optimal performance.
5.1 Cleaning a Foam Air Filter
If your lawn mower is equipped with a foam air filter, regular cleaning is necessary to remove accumulated dirt and debris. Start by removing the foam air filter cover, usually located on the side or top of the engine. Gently remove the foam filter and wash it with warm, soapy water. Rinse it thoroughly and squeeze out any excess water. Allow the filter to dry completely before applying a thin coat of clean engine oil. Reinstall the filter and secure the cover tightly.
5.2 Replacing a Paper Air Filter
Certain lawn mowers are equipped with paper air filters that require replacement rather than cleaning. Check the manufacturer’s recommendations for the specific interval at which the paper air filter should be replaced. To replace the paper air filter, locate the air filter housing, usually positioned near the carburetor. Remove the cover and old filter, and place the new filter in the housing. Ensure the filter is securely seated, then replace the cover and tighten it firmly.
6. Checking and Adjusting the Wheel Alignment
Proper wheel alignment ensures smooth and even cutting and prevents scalping or uneven lawn appearance. Checking and adjusting the wheel alignment is crucial for maintaining a well-cared-for lawn.
6.1 Inspecting the Wheel Alignment
Begin by examining the current wheel alignment of your lawn mower. Looking at the lawn mower from the rear, check if the wheels are aligned parallel to each other. Misaligned wheels can cause an uneven cut and affect the stability of the mower. If you notice any misalignment, adjustments are necessary.
6.2 Adjusting the Wheel Alignment
To adjust the wheel alignment, locate the adjustment mechanism, usually situated on the axle or wheel assembly. Loosen the adjustment bolt using a wrench or socket, and carefully adjust the wheel until it aligns parallel to the other wheel. Ensure both wheels are evenly adjusted to avoid dragging or abnormal cutting patterns. Once the alignment is correct, tighten the adjustment bolt securely to maintain the desired wheel alignment.
7. Inspecting the Drive Belt
The drive belt in a lawn mower transfers power from the engine to the wheels or blades, enabling them to rotate. Regular inspection of the drive belt will help identify signs of wear or damage before they cause major issues.
7.1 Locating the Drive Belt
To inspect the drive belt, consult your lawn mower’s manual to locate the drive belt. Usually, the drive belt is found on the underside of the lawn mower, connecting the engine to the wheels or blades.
7.2 Inspecting the Drive Belt
Carefully examine the drive belt for signs of cracking, fraying, or excessive wear. A worn or damaged drive belt can lead to poor performance or complete failure of the mower’s propulsion system. If you notice any issues with the drive belt, it may need to be replaced.
7.3 Replacing the Drive Belt
If the drive belt shows signs of wear or damage, it’s important to replace it. Start by removing any covers or guards that provide access to the drive belt. Release the tension on the drive belt by loosening the tensioning mechanism or pulley. Remove the old drive belt and install the new one, ensuring proper alignment and tension. Once the new drive belt is in place, reattach any covers or guards that were removed and test the mower to ensure proper functionality.
8. Cleaning and Replacing the Fuel Filter
The fuel filter helps prevent dirt and debris from reaching the engine, ensuring clean fuel for combustion. Over time, the fuel filter can become clogged, affecting the performance of the lawn mower. Cleaning or replacing the fuel filter is necessary to maintain optimal engine performance.
8.1 Locating the Fuel Filter
To locate the fuel filter, consult your lawn mower’s manual. The fuel filter is typically located between the fuel tank and the engine.
8.2 Cleaning the Fuel Filter
If your lawn mower has a reusable fuel filter, it can be cleaned to remove any accumulated debris. Start by removing the fuel filter from its housing, taking note of its correct orientation for reinstallation. Gently tap the filter against a clean surface to dislodge any trapped dirt or debris. Alternatively, you can use compressed air to blow away any obstructions. Once clean, inspect the filter for any signs of damage. If the filter is damaged or heavily clogged, it’s best to replace it.
8.3 Replacing the Fuel Filter
If your lawn mower’s fuel filter is not reusable or has significant damage, it’s crucial to replace it. Purchase a suitable replacement fuel filter and make sure it matches the manufacturer’s specifications. Remove the old fuel filter by disconnecting any fuel lines attached to it. Install the new filter in the correct orientation, ensuring a secure connection. Reattach any fuel lines and check for any leaks before starting the lawn mower.
9. Storing the Lawn Mower in the Off-Season
When the mowing season comes to an end, it’s important to properly store your lawn mower to ensure it remains in good condition during the off-season. Proper storage prevents rust, corrosion, and other damage, extending the life of your lawn mower.
9.1 Cleaning the Mower
Before storing your lawn mower, thoroughly clean it to remove any grass clippings, dirt, and debris. Follow the steps mentioned earlier to clean the mower deck, air filter, and blades. Use a damp cloth or sponge to wipe down the exterior surfaces of the lawn mower, including the handle and control panel. This will prevent corrosion and ensure your mower stays in good shape during storage.
9.2 Draining the Fuel
To prevent any fuel-related issues during storage, it’s advisable to drain the fuel from the lawn mower’s tank. Start by running the mower until the fuel tank is empty and the engine stalls. Alternatively, you can siphon the fuel out using a hand pump or a siphon kit. After draining the fuel, start the engine and let it run until it shuts off completely. This ensures that any remaining fuel in the carburetor is also consumed, preventing fuel buildup that can clog the fuel system.
9.3 Lubricating Moving Parts
Lubricating the moving parts of your lawn mower before storage helps protect them from rust and ensures they remain in good working condition. Apply a light coat of lubricating oil or spray lubricant to the pivot points, wheels, cables, and any other areas that require lubrication. Operate the controls and handles to distribute the lubricant evenly.
9.4 Storing in a Dry Location
Finally, choose a dry and well-ventilated location for storing your lawn mower. Avoid leaving it exposed to the elements, which can damage the machine and its components. If possible, cover the mower with a fitted cover or a tarp to prevent dust or moisture from accumulating. Keep the storage area away from any flammable materials and ensure it is inaccessible to children or animals.
10. Troubleshooting Common Issues
Even with proper maintenance, you may encounter some common issues with your lawn mower. Here are some troubleshooting tips to help you address these problems.
10.1 Lawn Mower Won’t Start
If your lawn mower fails to start, start by checking the spark plug. Ensure it is securely connected and not fouled or damaged. Check the fuel level and add fresh fuel if necessary. Inspect the air filter for cleanliness, as a dirty filter can restrict airflow and prevent the engine from starting. If the issue persists, it may require professional assistance.
10.2 Lawn Mower Runs Roughly
If the lawn mower runs rough or stalls during operation, the air filter may be dirty or clogged. Clean or replace the air filter as necessary. Check the spark plug for signs of wear or damage and replace if needed. If the issue continues, the carburetor may need cleaning or adjustment. It is recommended to consult a professional if you are uncertain about carburetor maintenance.
10.3 Uneven Cutting
If your lawn mower is cutting unevenly, it may be due to dull or unbalanced blades. Follow the steps outlined earlier to remove, sharpen, and balance the blades. Check the wheel alignment to ensure both wheels are parallel, preventing scalping or uneven cutting. Adjust the wheel alignment if necessary.
10.4 Excessive Vibration
Excessive vibration while operating the lawn mower can indicate unbalanced blades, loose components, or engine issues. Check the blade balance and adjust if needed. Inspect the blade retaining bolt and tighten it securely. Examine the engine mounts and other fasteners for any looseness or damage. If the problem persists, it is advisable to seek professional assistance.
By following these comprehensive steps for lawn mower maintenance, even beginners can take care of their equipment and ensure a healthy and well-maintained lawn. Regular maintenance not only improves the performance and lifespan of the lawn mower but also contributes to a more enjoyable mowing experience. Remember to always prioritize safety and consult the manufacturer’s manual for specific maintenance instructions. Happy mowing!