
Maintaining your zero-turn lawn mower is essential to ensure its optimal performance and longevity. In this article, you will discover a range of valuable tips and tricks to help you keep your mower in top-notch condition. From regular cleaning and lubricating to checking the tire pressure and sharpening the blades, these maintenance tips will not only save you time and money but also ensure a well-groomed and healthy lawn. So, let’s dive into the world of zero-turn lawn mower maintenance and keep your yard looking pristine all season long!
1. Checking the Oil
1.1. Importance of oil
Oil is a crucial component for the smooth operation and longevity of your zero-turn mower. It serves as a lubricant, reducing friction and preventing wear and tear on the engine’s moving parts. Additionally, oil helps to cool the engine and remove any contaminants that may accumulate over time. Regularly checking and maintaining the oil in your mower will ensure optimal performance and prevent costly repairs.
1.2. How often to check the oil
Checking the oil level in your zero-turn mower should be a regular part of your maintenance routine. For most models, it is recommended to check the oil level before each use or at least every 8-10 hours of operation. However, it is essential to refer to your mower’s user manual for specific guidelines, as there may be variations between different models and manufacturers.
1.3. Steps to check the oil
- Start by parking your zero-turn mower on a flat and level surface.
- Let the engine cool down for a few minutes to ensure an accurate oil level reading.
- Locate the oil dipstick, which is typically near the engine and labeled “oil.”
- Unscrew the dipstick and wipe it clean with a cloth or paper towel.
- Reinsert the dipstick fully into the oil fill tube and then remove it again.
- Check the oil level indicated on the dipstick. There are usually two marks, one for the minimum and one for the maximum level. Ensure that the oil level is between these two marks.
- If the oil level is low, you will need to add oil. Refer to the next section on how to add oil if necessary.
1.4. How to add oil if necessary
If the oil level in your zero-turn mower is below the minimum mark on the dipstick, it is crucial to add oil promptly. Follow these steps to add oil:
- Identify the oil fill port, usually located on the top or side of the engine.
- Remove the oil fill cap or plug.
- Using a funnel, slowly pour the recommended type and amount of oil into the oil fill port.
- Check the oil level periodically using the dipstick until it reaches the appropriate range.
- Securely replace the oil fill cap or plug.
- Dispose of any used oil properly, following local regulations.
Remember always to use the recommended type and grade of oil for your specific zero-turn mower, as specified by the manufacturer. This information can typically be found in the user manual or on the engine itself.
2. Maintaining the Air Filter
2.1. Purpose of the air filter
The air filter in your zero-turn mower is responsible for preventing dirt, debris, and other contaminants from entering the engine. It ensures that only clean air is combusted, improving fuel efficiency, and protecting the engine from damage. Regular maintenance of the air filter is vital to maintain optimal engine performance and extend its lifespan.
2.2. How often to clean/replace the air filter
The frequency at which you should clean or replace the air filter depends on various factors, such as operating conditions and air quality. It is recommended to check the air filter before each use or every 25 hours of operation, whichever comes first. However, if you frequently mow in dusty or dirty environments, more frequent inspections or replacements may be necessary.
2.3. Steps to clean/replace the air filter
Cleaning the air filter:
- Start by turning off the engine and allowing it to cool down.
- Locate the air filter housing, usually positioned near the engine.
- Remove the cover or housing to access the air filter.
- Carefully remove the air filter from the housing.
- Inspect the filter for dirt, debris, or damage.
- If the filter appears dirty or clogged, it can be cleaned using compressed air or by gently tapping it against a hard surface to dislodge any trapped particles.
- Once the filter is clean, reinsert it into the housing, ensuring it is properly seated.
- Replace the cover or housing securely.
Replacing the air filter:
- Turn off the engine and wait for it to cool down.
- Locate the air filter housing and remove the cover or housing.
- Take note of the make and model number of the existing air filter.
- Purchase a replacement air filter that matches the specifications of your zero-turn mower.
- Remove the old air filter from the housing.
- Insert the new air filter into the housing, ensuring it is properly seated.
- Replace the cover or housing securely.
Regularly inspecting and maintaining the air filter will help to optimize engine performance and prevent potential damage caused by airborne particles and debris.
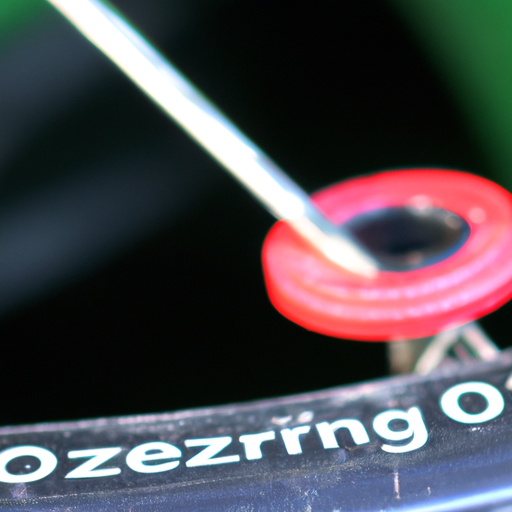
3. Inspecting and Replacing Spark Plugs
3.1. Importance of spark plugs
Spark plugs play a vital role in your zero-turn mower’s ignition system, providing the spark necessary for combustion. Over time, spark plugs can wear out or become fouled with carbon deposits, resulting in reduced performance, misfires, or difficulty starting the engine. Regular inspection and replacement of spark plugs are crucial to maintain reliable ignition and ensure optimal fuel efficiency.
3.2. Signs of worn-out spark plugs
It is important to be aware of the signs that your spark plugs may need replacement. Here are some common indicators of worn-out spark plugs:
- Difficulty starting the engine
- Engine misfires or runs roughly
- Reduced fuel efficiency
- Poor acceleration or loss of power
- Black, sooty deposits on the spark plug tip
- Excessive wear or erosion of the electrode
If you observe any of these signs, it is recommended to inspect and possibly replace the spark plugs of your zero-turn mower.
3.3. How often to inspect/replace spark plugs
The frequency of spark plug inspection and replacement depends on the recommendations provided by the manufacturer. In general, it is advisable to inspect the spark plugs every 100 hours of operation or at least once a year, whichever comes first. However, if you notice any of the signs mentioned earlier, it is important to check and potentially replace the spark plugs sooner.
3.4. Steps to inspect/replace spark plugs
Inspecting spark plugs:
- Before inspecting the spark plugs, make sure the engine is turned off and has cooled down.
- Locate the spark plugs, which are typically positioned on the side or top of the engine.
- Remove the spark plug wire by gently pulling on the boot, avoiding the wire itself.
- Use a socket wrench with a spark plug socket to carefully unscrew the spark plug from the cylinder head.
- Examine the spark plug for any signs of wear, damage, or excessive carbon deposits.
- Compare the condition of the spark plug to a reference chart or consult the manufacturer’s guidelines to determine if replacement is necessary.
- If the spark plug appears to be in good condition, clean the electrode using a wire brush and reinstall it. Ensure proper torque when tightening the plug.
Replacing spark plugs:
- Ensure the engine is turned off and has cooled down.
- Locate the spark plugs and remove the spark plug wire from each plug.
- Unscrew the old spark plugs using a socket wrench and spark plug socket.
- Take note of the spark plug’s make and model number.
- Purchase new spark plugs that match the manufacturer’s specifications.
- Install the new spark plugs by hand, ensuring they are threaded correctly and not cross-threaded.
- Use a socket wrench to tighten the spark plugs to the manufacturer’s recommended torque.
- Reattach the spark plug wire, making sure it is securely connected.
Regularly inspecting and replacing spark plugs when necessary will help to maintain a well-functioning ignition system and ensure that your zero-turn mower operates at its best.
4. Checking and Adjusting the Deck Height
4.1. Importance of deck height
The deck height of your zero-turn mower determines the cutting height of the grass. Properly adjusting the deck height is crucial to achieve an evenly cut lawn and prevent scalping or excessive stress on the grass. By monitoring and adjusting the deck height as needed, you can ensure a healthy and aesthetically pleasing lawn.
4.2. How often to check the deck height
The deck height should be checked before each mowing session or whenever you transition to mowing in a different area with different grass lengths. It is important to adjust the deck height according to the grass type, season, and mowing conditions to achieve the desired results.
4.3. Steps to check and adjust the deck height
- Park your zero-turn mower on a flat and level surface.
- Identify the deck height adjustment mechanism, which is typically located near the operator’s seat or on the deck itself.
- Refer to your mower’s user manual to determine the available deck height settings and the recommended heights for specific grass types and conditions.
- Adjust the deck height to the desired setting using the adjustment mechanism.
- Check the deck height by measuring the distance between the ground and the bottom of the deck using a tape measure or ruler.
- Make any necessary adjustments to ensure the deck height is consistent across the entire cutting deck.
- Once the desired deck height is achieved, engage the deck and visually inspect that it is level and parallel to the ground.
Ensuring the correct deck height will help you achieve a well-maintained lawn while minimizing potential damage to the grass.
5. Sharpening the Blades
5.1. Importance of sharp blades
Sharp blades are essential for a clean and precise cut when mowing with your zero-turn mower. Dull blades can tear the grass instead of cleanly cutting it, resulting in a ragged appearance and increased susceptibility to diseases. Regularly inspecting and sharpening the blades will enhance the cutting performance, promote a healthier lawn, and reduce strain on the mower’s engine.
5.2. Signs of dull blades
It is important to be able to recognize the signs indicating that your blades may require sharpening. Here are some common indicators of dull blades:
- Uneven or frayed grass tips after mowing
- Grass blades with ragged edges instead of clean cuts
- Increased resistance and strain on the mower’s engine
- Reduced cutting efficiency and the need for multiple passes to achieve a desired cut
If you notice any of these signs, it is essential to inspect and sharpen the blades to ensure optimal cutting performance.
5.3. How often to sharpen the blades
The frequency of blade sharpening depends on several factors, including the size of your lawn, the type of terrain, and the length and thickness of the grass. As a general guideline, it is recommended to sharpen the blades of your zero-turn mower every 20-25 hours of operation or at least once a mowing season. However, if you frequently encounter challenging cutting conditions or notice a decline in cutting performance, more frequent sharpening may be necessary.
5.4. Steps to sharpen the blades
- Ensure the engine is turned off, the spark plug wire is disconnected, and the blades have come to a complete stop.
- Locate the blade inspection and removal area, usually beneath the cutting deck of your zero-turn mower.
- Raise the deck to the highest position to gain better access to the blades.
- Carefully remove the blades, taking note of their orientation for reinstallation.
- Clean the blades using a wire brush or scraper to remove any caked-on grass clippings or debris.
- Inspect the blades for any signs of damage, cracks, or excessive wear. If the blades appear damaged, it is recommended to replace them.
- Secure the blade in a vise or use a blade sharpening tool to sharpen the cutting edge. Follow the manufacturer’s instructions for proper sharpening techniques.
- After sharpening, make sure the blade is balanced. An unbalanced blade can cause vibration and potential damage to the mower.
- Repeat the sharpening and balancing process for the remaining blades, if applicable.
- Once all the blades are sharpened and balanced, reinstall them in their proper orientation.
- Tighten the blade bolts to the manufacturer’s recommended torque, ensuring a secure fit.
- Lower the cutting deck to the desired mowing height.
Regularly inspecting and sharpening the blades will ensure a clean and professional-looking cut, promoting a healthier lawn overall.
6. Cleaning the Cutting Deck
6.1. Importance of a clean cutting deck
Maintaining a clean cutting deck is essential for optimal cutting performance and the overall health of your zero-turn mower. Over time, grass clippings, dirt, and debris can accumulate on the cutting deck, hindering proper airflow and causing potential clogs. Regular cleaning of the cutting deck will help prevent these issues, ensuring even grass distribution, minimizing corrosion, and extending the lifespan of the mower.
6.2. How often to clean the cutting deck
Cleaning the cutting deck should be done after each mowing session, or whenever you observe excessive build-up of grass clippings or debris. By incorporating this task into your regular maintenance routine, you can maintain optimal cutting performance and prevent potential issues.
6.3. Steps to clean the cutting deck
- Park your zero-turn mower on a flat and level surface and set the parking brake.
- Ensure the engine is turned off, the spark plug wire is disconnected, and the cutting blades have come to a complete stop.
- Put on protective gloves and eye goggles before beginning the cleaning process.
- Use a putty knife or scraper to gently remove any large clumps of grass or debris from the cutting deck. Take care not to damage the blades or the deck surface.
- Fill a bucket or container with warm soapy water or a suitable cleaning solution.
- Dip a scrub brush or cleaning cloth into the soapy water and scrub the interior and exterior surfaces of the cutting deck, paying particular attention to the areas where grass clippings tend to accumulate.
- Rinse the cutting deck thoroughly with clean water to remove any remaining dirt or residue.
- Use a high-pressure hose or air compressor to blow dry the cutting deck or allow it to air dry completely.
- After the cutting deck is dry, apply a thin coat of lubricating oil or silicone spray to help prevent corrosion.
Regularly cleaning the cutting deck will ensure optimal cutting performance, minimize grass clogs, and extend the lifespan of your zero-turn mower.
7. Inspecting and Replacing Belts
7.1. Importance of belts
Belts are essential components in your zero-turn mower’s drive system, responsible for transferring power from the engine to various moving parts. Over time, belts can wear out, stretch, or become damaged, resulting in decreased performance and potential breakdowns. Regularly inspecting and replacing belts when necessary will help to ensure the smooth operation of your zero-turn mower.
7.2. Signs of worn-out belts
It is important to be able to identify the signs indicating that your belts may need replacing. Here are some common indicators of worn-out belts:
- Squealing or screeching noises coming from the mower while in operation
- Slipping or slipping off the pulleys
- Excessive belt vibrations or visible fraying
- Decreased or loss of traction when driving the mower
- Difficulty engaging the cutting deck or other attachments
If you notice any of these signs, it is crucial to inspect and possibly replace the belts to avoid inconvenient breakdowns and ensure proper operation.
7.3. How often to inspect/replace belts
The frequency of belt inspection and replacement varies depending on factors such as usage, operating conditions, and the manufacturer’s recommendations. As a general guideline, it is advisable to inspect the belts every 100 hours of operation or at least once a year. However, if you notice any signs of wear or damage, it is important to check and possibly replace the belts sooner.
7.4. Steps to inspect/replace belts
Inspecting belts:
- Ensure the engine is turned off, the spark plug wire is disconnected, and the mower is parked on a flat and level surface.
- Identify the different belts and pulleys in your zero-turn mower’s drive system.
- Inspect each belt for signs of wear, damage, cracks, and excessive stretching.
- Check the tension of the belts by gently pressing on them. They should feel firm and have minimal give.
- Ensure that the belts are properly aligned and correctly seated on the pulleys.
Replacing belts:
- Turn off the engine, wait for it to cool down, and disconnect the spark plug wire.
- Identify the specific belts that need replacement.
- Refer to your mower’s user manual or consult the manufacturer’s guidelines to determine the correct replacement belts.
- Follow the instructions provided for your specific zero-turn mower model to access and remove the old belts.
- Install the new belts, ensuring that they are properly aligned and positioned on the pulleys.
- Adjust the tension of the belts according to the manufacturer’s recommendations, ensuring they have the specified amount of deflection.
- Reattach any guards, covers, or hardware that were removed during the replacement process.
- Double-check the alignment, tension, and positioning of the new belts before starting the mower.
Regularly inspecting and replacing belts when necessary will help to maintain the efficiency and reliability of your zero-turn mower’s drive system.
8. Lubricating Moving Parts
8.1. Importance of lubrication
Proper lubrication of the moving parts in your zero-turn mower is essential for reducing friction, prolonging component life, and ensuring smooth operation. Over time, the lubrication on these parts can degrade, leading to increased wear, heat, and potential breakdowns. Regularly lubricating the moving parts will help to maintain optimal performance and minimize the risk of costly repairs.
8.2. How often to lubricate moving parts
The frequency of lubrication depends on the specific moving parts and the manufacturer’s recommendations for your zero-turn mower. In general, it is advisable to lubricate the moving parts at least once a season or every 25-50 hours of operation. However, it is essential to consult your mower’s user manual for specific guidelines and instructions.
8.3. Steps to lubricate moving parts
-
Refer to your zero-turn mower’s user manual to identify the moving parts that require lubrication and the recommended lubricants.
-
Ensure the engine is turned off, the spark plug wire is disconnected, and the mower is parked on a flat and level surface.
-
Prepare the appropriate lubricant(s) specified by the manufacturer.
-
Apply lubricant to the moving parts as per the guidelines provided.
- Commonly lubricated parts include:
- Pivot points and linkage components
- Wheel axles and bearings
- Suspension components
- Control levers and cables
It is important to follow the manufacturer’s recommendations regarding the amount and location of lubrication for each specific part.
-
Take note of any additional maintenance tasks, such as greasing fittings or inspecting the transmission, that may be required for proper lubrication of your zero-turn mower.
By regularly lubricating the moving parts of your zero-turn mower, you can minimize friction and ensure smooth operation, enhancing the overall performance and lifespan of the machine.
9. Maintaining the Battery
9.1. Importance of battery maintenance
The battery is a crucial component of your zero-turn mower’s electrical system, providing the power necessary for starting the engine. Regular maintenance of the battery is important to ensure reliable starting, prevent power loss, and extend its lifespan. Neglecting battery maintenance can lead to premature failure and inconvenience when you need to start your mower.
9.2. How often to check and charge the battery
It is recommended to check the battery’s condition and charge level before the start of each mowing season or at least once every six months, especially for mowers that may be stored for longer periods. Additionally, if you notice any signs of weak starting or inadequate power supply, it is important to check and charge the battery as needed throughout the mowing season.
9.3. Steps to check and charge the battery
Checking the battery:
- Turn off the engine, wait for it to cool down, and disconnect the spark plug wire.
- Locate the battery on your zero-turn mower. It is typically positioned in an easily accessible area, such as under the seat or near the engine.
- Inspect the battery for any signs of damage, corrosion, loose connections, or leaking acid.
- Ensure that the battery cables and terminals are secure and free from corrosion. If necessary, clean the terminals using a mixture of baking soda and water, and gently scrub with a wire brush.
- Check the battery’s charge level using a voltmeter or battery tester. A fully charged battery typically reads around 12.6 to 12.8 volts.
- If the battery charge is low, it will need to be recharged. Refer to the next section on how to charge the battery.
Charging the battery:
- Remove the battery from the zero-turn mower if necessary, following the manufacturer’s instructions.
- Prepare a suitable battery charger and ensure it is compatible with your battery type (e.g., lead-acid, lithium-ion).
- Connect the charger to a power source and set it to the appropriate charging mode (slow charge for deep discharge, maintenance charge for regular maintenance).
- Attach the charger clamps or terminals to the corresponding battery terminals, ensuring a secure and proper connection.
- Follow the charger’s instructions regarding the charging time and any additional settings.
- Monitor the charging process and ensure that the charger does not overcharge the battery. Overcharging can damage the battery or lead to the release of harmful gases.
- Once the battery is fully charged, disconnect the charger and remove the clamps or terminals in the reverse order from how they were connected.
- Reinstall the battery in your zero-turn mower, ensuring the cables are securely attached and the terminals are clean.
Regularly checking and charging the battery when necessary will help to ensure reliable starting and proper functioning of your zero-turn mower’s electrical system.
10. Storing the Zero-turn Mower
10.1. Importance of proper storage
Properly storing your zero-turn mower during periods of non-use, such as over the winter or during extended breaks, is essential for maintaining its condition and extending its lifespan. By following the appropriate steps for storage, you can minimize the risk of damage, corrosion, and potential breakdowns when it’s time to use the mower again.
10.2. Steps to prepare the mower for storage
- Thoroughly clean the cutting deck, removing any grass clippings or debris, and ensure it is completely dry.
- Inspect the mower for any signs of damage, loose fittings, or worn-out components. Address any issues before proceeding with storage.
- Change the oil and oil filter as specified in your mower’s user manual. This will help prevent contaminants from degrading the oil and causing damage during storage.
- Add a fuel stabilizer to the fuel tank and run the engine for a few minutes to distribute the stabilizer throughout the fuel system. This will help to prevent the fuel from deteriorating and clogging the engine.
- Remove the spark plug(s) and apply a small amount of oil to the cylinder(s). Slowly pull the starter cord a few times to distribute the oil and lubricate the cylinder walls.
- Install a new spark plug or reinstall the existing one, ensuring a proper torque.
- Disconnect the battery or remove it from the mower, if applicable, and store it separately in a cool and dry location.
- Thoroughly inspect and clean the air filter. If necessary, clean or replace the filter according to the manufacturer’s instructions.
- Lubricate any moving parts, such as pivot points or suspension components, as recommended by the manufacturer.
- Ensure the mower is stored in a cool, dry, and well-ventilated area, away from direct sunlight, excessive moisture, or extreme temperatures.
- Cover the mower with a fitted cover or tarp to protect it from dust, debris, and potential damage.
10.3. Tips for long-term storage
- Check the storage area periodically to ensure it remains dry and free from pests or rodents.
- Avoid using fuel additives or starting aids that are not recommended by the manufacturer, as they may cause damage or void warranty.
- If storing the mower for an extended period, consider removing the battery and storing it in a separate location, charging it periodically to maintain its charge.
- When preparing the mower for use after storage, ensure all components are properly reconnected, and conduct a thorough inspection, addressing any issues before starting the engine.
By following these storage guidelines, you can help preserve the condition and performance of your zero-turn mower during periods of non-use.