
Imagine the satisfaction of effortlessly gliding across your lawn, as your self-propelled lawn mower takes care of all the hard work for you. But what if something feels off? Don’t worry, adjusting a self-propelled lawn mower is easier than you might think. In this article, we’ll guide you through the simple steps to ensure your mower is running smoothly and effectively, giving you the perfect cut every time. Whether it’s fine-tuning the speed settings or adjusting the cutting height, we’ve got you covered. Let’s get started!

This image is property of i.ytimg.com.
Adjusting the Cutting Height
Checking the Current Cutting Height
Before making any adjustments to the cutting height of your self-propelled lawn mower, it’s important to first check the current setting. This can usually be done by referring to the user manual or by visually inspecting the height adjustment lever or knob on the mower deck.
Adjusting the Cutting Height
Once you have determined the current cutting height of your mower, you may decide to adjust it to better suit your lawn maintenance needs. To do this, locate the cutting height adjustment lever or knob on your mower deck. This may be a lever that can be moved up or down, or a numbered dial that can be rotated.
To raise the cutting height, simply move the lever or rotate the dial to the desired height. If you want a shorter cut, move the lever or rotate the dial in the opposite direction. Be sure to adjust the cutting height evenly on all sides of the mower deck to ensure an even cut across your entire lawn.
Testing the New Cutting Height
After adjusting the cutting height, it’s a good idea to test it out before proceeding with any further lawn care tasks. Take your self-propelled mower for a test drive on your lawn, paying close attention to the quality of the cut. If you find that the new cutting height is satisfactory, you can proceed with the rest of your lawn maintenance tasks. If not, you may need to make additional adjustments until you achieve the desired cutting height.
Calibrating the Drive System
Identifying Drive Wheel Adjustments
The drive system of your self-propelled lawn mower is what allows it to move forward or backward without any physical exertion on your part. Before calibrating the drive system, it’s important to identify any adjustments that may need to be made to ensure optimal performance. This can usually be done by checking the user manual or visually inspecting the drive wheels.
Adjusting the Drive Speed
Once you have identified any necessary adjustments to the drive system, you can proceed with calibrating the drive speed of your self-propelled lawn mower. This can usually be done by locating the drive speed adjustment lever or knob on the mower handle.
To increase the drive speed, simply move the lever or rotate the knob in the appropriate direction. If you want to decrease the drive speed, move the lever or knob in the opposite direction. Take your time to find the drive speed that works best for you and your lawn.
Checking the Traction Control
In addition to adjusting the drive speed, it’s important to check the traction control of your self-propelled lawn mower. This ensures that the wheels have enough grip to effectively propel the mower forward or backward. Traction control can usually be adjusted by tightening or loosening the nuts or bolts located on the wheels.
To check the traction control, simply push the mower forward or backward while the engine is off. If you find that the wheels are slipping or struggling to maintain traction, you may need to tighten the nuts or bolts to increase the grip. On the other hand, if the wheels are not turning freely, you might need to loosen the nuts or bolts to reduce friction.

This image is property of i.ytimg.com.
Maintaining the Engine
Checking the Engine Oil Level
Regularly checking the engine oil level of your self-propelled lawn mower is a crucial part of engine maintenance. To do this, locate the oil dipstick on the engine and remove it. Wipe off any oil on the dipstick with a clean cloth and reinsert it fully into the oil reservoir.
Once the dipstick is fully inserted, remove it again and observe the oil level. If the oil level is below the minimum mark, you will need to add more oil. On the other hand, if the oil level is above the maximum mark, you may need to drain some oil. Refer to the user manual for the specific type and amount of oil your mower requires.
Changing the Engine Oil
In addition to checking the engine oil level, it’s important to change the engine oil of your self-propelled lawn mower regularly. Over time, the engine oil can become contaminated with dirt, debris, and other impurities, which can affect the performance and longevity of your mower.
To change the engine oil, start by locating the oil drain plug on the bottom of the engine. Place an oil pan or container beneath the drain plug to catch the old oil. Unscrew the drain plug and allow the old oil to drain completely. Once the oil has drained, replace the drain plug and tighten it securely.
Next, locate the oil fill cap or dipstick on the engine and remove it. Pour the appropriate amount of fresh engine oil into the oil reservoir, making sure not to overfill. Once you have added the new oil, replace the oil fill cap or dipstick and ensure it is tightened properly.
Cleaning or Replacing the Air Filter
The air filter of your self-propelled lawn mower is responsible for preventing dust, dirt, and other debris from entering the engine. Over time, the air filter can become clogged and restrict airflow, which can negatively impact the performance and fuel efficiency of your mower.
To clean the air filter, start by removing the cover or housing that encloses the air filter. Once the cover is removed, carefully take out the air filter. If the air filter is made of foam or fabric, you can wash it with warm soapy water. Gently squeeze out any excess water and allow the filter to dry completely before reinstalling it.
If the air filter is overly dirty or damaged, it may need to be replaced. Refer to the user manual for your specific mower model to find the correct replacement air filter. Ensure that the new air filter is installed correctly, with the proper orientation, before reattaching the cover or housing.
Inspecting and Replacing the Blades
Removing the Blade Guard
Before inspecting or replacing the blades of your self-propelled lawn mower, it’s essential to ensure your safety by removing the blade guard. Start by disconnecting the spark plug to prevent accidental starts while working on the blades. Then, carefully tilt the mower on its side, ensuring that the air filter is elevated to prevent oil or fuel leakage.
With the mower in a safe position, take a wrench or socket wrench to remove the blade guard, which is usually secured with bolts or screws. Set aside the blade guard in a safe place where it won’t accidentally be bumped or cause injury.
Inspecting the Blades
With the blade guard removed, you can now inspect the blades of your self-propelled lawn mower for any signs of damage or wear. Look for any chips, cracks, or excessive bending in the blades. It’s important to note that damaged or worn blades can result in an uneven or poor-quality cut, and may even pose a safety risk.
If you notice any damage to the blades, it’s recommended to replace them to ensure optimal performance. Refer to the user manual or contact the manufacturer to obtain the correct replacement blades for your specific mower model.
Sharpening or Replacing the Blades
If the blades of your self-propelled lawn mower are dull but still in good condition, you may choose to sharpen them instead of replacing them. Sharpening the blades will help ensure a clean and precise cut, resulting in a healthier and more attractive lawn.
To sharpen the blades, you will need a blade sharpening kit or a professional blade sharpener. Carefully follow the instructions provided with the sharpening tool to achieve the best results. Make sure to wear protective gloves and eyewear while sharpening the blades to minimize the risk of injury.
If, after sharpening the blades, you find that they are still not cutting effectively or are excessively damaged, it’s recommended to replace them. Remember to reinstall the new or sharpened blades in the correct orientation and securely tighten the blade guard before using your self-propelled mower again.

This image is property of www.thecleverhomeowner.com.
Adjusting the Drive Belt
Locating the Drive Belt
The drive belt is an essential component of the drive system in your self-propelled lawn mower. It connects the engine to the wheels, allowing them to turn and drive the mower forward or backward. Before adjusting or replacing the drive belt, you will need to locate it on your specific mower model.
To locate the drive belt, refer to the user manual or visually inspect the deck and engine area of your self-propelled lawn mower. The drive belt is usually made of rubber and can often be seen running along pulleys or wheels.
Checking the Tension of the Drive Belt
To ensure optimal performance of your self-propelled lawn mower, it’s important to regularly check the tension of the drive belt. The drive belt should be properly tensioned to prevent slipping or excessive wear, which can lead to decreased performance and premature belt failure.
To check the tension of the drive belt, start by carefully locating the tensioner or adjustment mechanism for the belt. This could be a tensioner pulley or an adjustable bracket. Once you have located the tensioner, inspect the drive belt to ensure that it is not slack or overly tight.
If the drive belt is too loose, it will need to be tightened. This can usually be done by adjusting the tensioner or by moving an adjustable bracket. On the other hand, if the drive belt is too tight, it will need to be loosened to prevent unnecessary strain on the belt and other drive system components.
Adjusting or Replacing the Drive Belt
If the drive belt of your self-propelled lawn mower is damaged, excessively worn, or no longer properly tensioned, it will need to be adjusted or replaced. Refer to the user manual or contact the manufacturer to obtain the correct replacement drive belt for your specific mower model.
To adjust or replace the drive belt, start by carefully following the instructions provided in the user manual. This may involve loosening or removing certain components to gain access to the drive belt, such as the blade guard or deck cover. Once you have removed any necessary components, you can then adjust or replace the drive belt as instructed.
Remember to properly tension the drive belt once it has been adjusted or replaced. This will help ensure optimal performance of your self-propelled lawn mower and prolong the lifespan of the belt and other drive system components.
Checking and Adjusting the Wheel Height
Determining the Current Wheel Height
The wheel height of your self-propelled lawn mower plays a crucial role in achieving an even and uniform cut. Before making any adjustments to the wheel height, it’s important to determine the current setting. This can usually be done by referring to the user manual or visually inspecting the height adjustment mechanism on each wheel.
Adjusting the Wheel Height
Once you have determined the current wheel height of your self-propelled lawn mower, you may choose to adjust it to achieve the desired cutting height. To do this, locate the height adjustment mechanism on each wheel. This may involve adjusting a lever, knob, or pin that controls the height of the wheel.
To raise the wheel height, simply move the lever, rotate the knob, or adjust the pin to the desired setting. If you want a lower wheel height, make the appropriate adjustment in the opposite direction. Be sure to adjust the wheel height evenly on all wheels to ensure an even cut across your entire lawn.
Ensuring Proper Wheel Alignment
In addition to adjusting the wheel height, it’s important to ensure proper wheel alignment on your self-propelled lawn mower. Misaligned wheels can result in an uneven cut and cause unnecessary strain on the drivetrain.
To check the wheel alignment, simply measure the distance between the inside edges of the front wheels and the back wheels. The measurements should be equal on both sides of the mower. If you find that the measurements are not equal, you may need to adjust the alignment by loosening or tightening the bolts or nuts connecting the wheels to the mower.
Proper wheel alignment will help ensure an even and consistent cut across your lawn, as well as prolong the lifespan of the wheels and overall drivetrain of your self-propelled lawn mower.

This image is property of www.theherbcottage.com.
Clearing Build-up and Debris
Clearing Debris from the Wheels
Over time, debris such as grass clippings, twigs, and dirt can accumulate on the wheels of your self-propelled lawn mower. This can affect the traction and performance of the mower, making it important to regularly clear any build-up.
To clear debris from the wheels, start by turning off the engine and disconnecting the spark plug. Carefully tilt the mower onto its side, ensuring that the air filter is elevated to prevent oil or fuel leakage. Use a brush or a cloth to remove any debris from the wheels, being careful not to damage them in the process.
Once you have cleared the debris, gently rotate the wheels to ensure they are turning freely and without any obstructions. This will help maintain optimal performance and prevent any unnecessary strain on the drive system.
Cleaning the Undercarriage
Another area prone to build-up and debris is the undercarriage of your self-propelled lawn mower. Grass clippings, dirt, and other debris can accumulate on the underside of the mower deck, affecting the airflow and cutting ability.
To clean the undercarriage, start by once again disconnecting the spark plug and tilting the mower onto its side. Use a brush or a scraper to remove any build-up from the underside of the mower deck, being careful not to damage the blades in the process.
It may also be necessary to use a hose or pressure washer to thoroughly clean the undercarriage. This can help remove any stubborn debris and ensure maximum airflow and cutting efficiency.
Removing Grass Clippings from the Mower
After mowing your lawn with a self-propelled mower, it’s important to remove any grass clippings that may have accumulated on the surface of the mower. This will help prevent build-up and ensure optimal performance and longevity.
To remove grass clippings, start by turning off the mower and disconnecting the spark plug. Use a brush or a cloth to wipe away any clippings from the surface of the mower, paying close attention to any vents or openings where debris may have collected.
It’s recommended to clean the mower and remove grass clippings after each use to maintain its performance and prevent any potential issues with clogging or overheating.
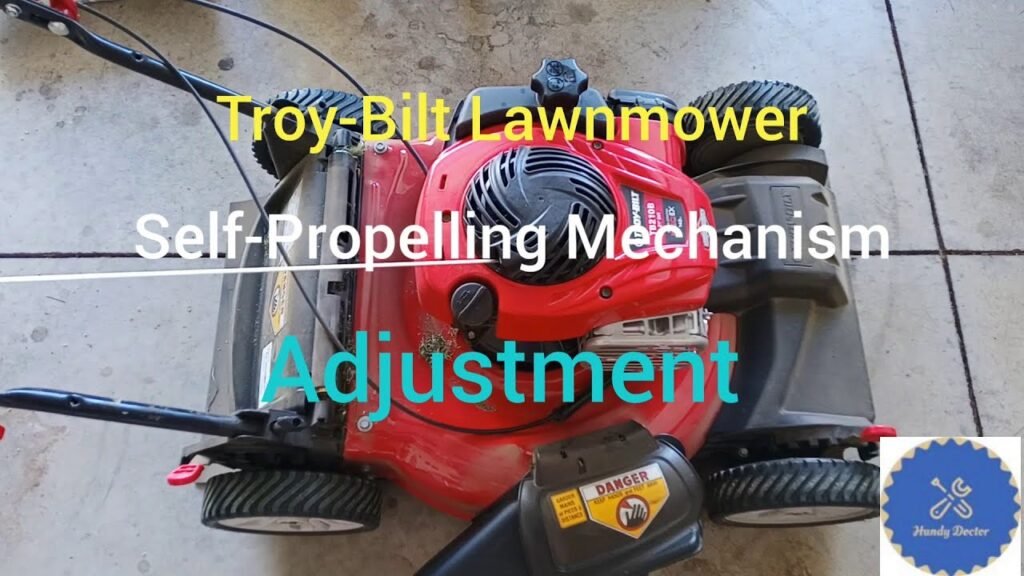
Testing the Self-Propelled Function
Starting the Self-Propelled System
The self-propelled function of your lawn mower allows it to move forward or backward without the need for manual pushing. Before testing the self-propelled function, ensure that the engine is running and the safety features, such as the blade engagement control, are disengaged.
To start the self-propelled system, simply engage the drive control lever or engage the self-propelled system through a designated button or switch on the handle. Once engaged, the mower should start moving forward or backward on its own.
Checking the Speed Function
After engaging the self-propelled system, it’s important to check the speed function to ensure it is set at a comfortable and controllable pace. Most self-propelled lawn mowers offer variable speed settings, allowing you to adjust the speed to your liking.
To check the speed function, start by observing how fast the mower is moving. If you find that the speed is too fast or too slow, adjust the speed control lever, knob, or button accordingly. Take your time to find the speed setting that works best for you and the conditions of your lawn.
Adjusting the Self-Propelled Controls
If you find that the self-propelled controls of your lawn mower are not responding properly or are not providing the desired level of control, adjustments may be necessary. Common adjustments include tightening or loosening the nuts or bolts that secure the handle or adjusting the tension of the drive cable.
Refer to the user manual or contact the manufacturer for specific instructions on how to adjust the self-propelled controls of your lawn mower. Proper adjustment will help ensure a smoother and more controlled operation, allowing you to navigate your lawn with ease.

This image is property of i.ytimg.com.
Lubricating Moving Parts
Identifying the Moving Parts Requiring Lubrication
Regular lubrication of the moving parts on your self-propelled lawn mower is essential for optimal performance and longevity. Before applying lubricant, it’s important to identify the specific moving parts that require lubrication.
Common moving parts that may require lubrication include the wheels, axles, pulleys, and drive system components. Refer to the user manual or visually inspect your lawn mower to determine the specific areas that need to be lubricated.
Applying Lubricant to the Moving Parts
Once you have identified the moving parts that require lubrication, you can proceed with applying the appropriate lubricant. It’s recommended to use a high-quality lubricating oil or a specialized lubricant specifically designed for lawn mower applications.
Start by cleaning any dirt or debris from the moving parts using a clean cloth or brush. This will ensure that the lubricant can properly penetrate and protect the components. Apply a small amount of lubricant to each moving part, taking care to avoid over-application.
Ensure that the lubricant reaches all areas of the moving parts, including any bearings or bushings. Use a cloth or brush to spread the lubricant evenly and remove any excess. Proper lubrication will help reduce friction, minimize wear, and extend the lifespan of the moving parts.
Testing the Lubricated Parts
After applying lubricant to the moving parts, it’s a good idea to test them to ensure they are functioning smoothly and without any unnecessary resistance. Start the engine of your self-propelled lawn mower and engage the drive system to observe the movement of the lubricated parts.
If you find that the lubricated parts are still not moving smoothly or are exhibiting signs of resistance, you may need to reapply lubricant or make further adjustments. Regularly testing and maintaining the lubricated parts will help ensure optimal performance and prevent premature wear or failure.
Storing the Lawn Mower
Cleaning the Mower before Storage
Properly cleaning your self-propelled lawn mower before storing it is essential to prevent the build-up of dirt, grass clippings, and other debris. These contaminants can corrode the mower’s components over time, reducing its lifespan and performance.
Start by turning off the engine and disconnecting the spark plug. Use a brush or a cloth to remove any debris from the surface of the mower, paying special attention to the air vents and cooling fins. It may also be necessary to use a hose or pressure washer to thoroughly clean the mower and remove any stubborn build-up.
Once the mower is clean and dry, apply a thin layer of lubricating oil or rust inhibitor to any exposed metal surfaces. This will help protect the mower from rust and corrosion during storage.
Draining or Stabilizing the Fuel
Before storing your self-propelled lawn mower, it’s important to properly address the fuel to prevent any issues with stale fuel or fuel system damage. There are two main options for handling the fuel before storage: draining it or adding a fuel stabilizer.
If you choose to drain the fuel, start by running the engine until it stalls from lack of fuel. This will ensure that the fuel system is empty, preventing any fuel from becoming stale or causing damage to the carburetor. It’s important to dispose of the drained fuel properly according to local regulations.
Alternatively, you can add a fuel stabilizer to the fuel tank to prevent the fuel from deteriorating during storage. Follow the instructions on the fuel stabilizer product carefully and run the engine for a few minutes to ensure the stabilized fuel circulates through the fuel system.
Storing in a Dry and Safe Location
To prolong the lifespan of your self-propelled lawn mower and maintain its performance, it’s important to store it in a proper location during periods of non-use. Choose a dry and well-ventilated area, such as a shed or garage, where the mower will be protected from moisture and extreme temperatures.
Before storing the mower, check all components and ensure they are in good condition. Secure any loose parts or covers, and store any necessary tools or accessories in a safe place near the mower.
Cover the mower with a protective cover or tarp to further shield it from dust, debris, and potential damage. Make sure the cover is securely fastened to prevent it from being blown off or damaged.
Following these storage guidelines will help ensure that your self-propelled lawn mower is ready for use and in optimal condition when the next mowing season arrives. Proper storage will also help extend the lifespan of your mower and prevent unnecessary repairs or maintenance.